
Before taking a sledgehammer to your walls, preparation is the silent hero that shapes a smooth drywall removal process. When you skip the planning stage, dust invades your furniture, electrical systems become vulnerable, and what could have been a one-day job turns into a week of frustration. Preparing your home means creating a safe, organized workspace where every move has purpose. Think of it as laying the foundation for an efficient, mess-free teardown.
Start by identifying which sections of drywall need to go—whether it’s water-damaged areas, outdated texture, or a complete remodel. Once the scope is clear, you can begin shielding your space from chaos. Cover floors with plastic sheeting, remove delicate items, and tape off doorways to prevent dust migration. The more intentional your setup, the easier cleanup becomes later. Preparation is not just about safety; it’s about working smart and protecting your investment.
Clearing the Room Before the Work Begins
A clean slate makes everything easier. Before you start, remove all furniture, décor, and personal belongings from the room. Even small items can become dust magnets, so it’s best to empty the space entirely. Large pieces that can’t be moved should be wrapped tightly in plastic or old sheets. Pay attention to light fixtures and ceiling fans—cover them or temporarily remove them to avoid damage.
Once the space is clear, sweep and vacuum the floor to minimize pre-existing dust. The fewer particles in the air before removal, the better the post-demolition air quality will be. Keeping your space clean from the start sets the tone for efficiency and helps reduce time spent scrubbing after the project ends. A clutter-free area also enhances visibility, making it easier to spot wiring, plumbing, or framing hidden behind walls.
Protecting Your Floors and Fixtures
Floors often suffer during demolition projects, especially when heavy tools or ladders come into play. Shielding them is crucial. Plastic drop cloths or heavy-duty tarps can prevent scratches and make cleanup easier. If your flooring is hardwood or tile, consider adding a layer of cardboard underneath the tarp for added cushioning.
Don’t forget about electrical outlets, switches, or trim. Use painter’s tape to seal them, preventing dust from sneaking in. For light fixtures and vents, a simple plastic wrap will do wonders. This kind of attention to detail keeps your home’s surfaces intact while saving you time on post-project restoration. Protection doesn’t just preserve your property—it ensures that once the drywall is gone, you can move right into the rebuilding phase without unnecessary repairs.
Managing Dust and Air Quality
Dust is the invisible intruder that can linger long after drywall removal. It spreads fast, clinging to every surface and finding its way into vents. To combat it, close off HVAC registers and use a vacuum with a HEPA filter to trap fine particles. A box fan positioned near a window can push dust outside, maintaining airflow without contamination.
Wear protective masks and goggles, especially when breaking down large drywall panels. Tiny gypsum particles can irritate your eyes and lungs. If possible, use a utility knife to score drywall before removing it; this limits the amount of debris released. The more contained your workspace is, the healthier your environment will be. Proper dust management doesn’t just protect your home—it safeguards your well-being.
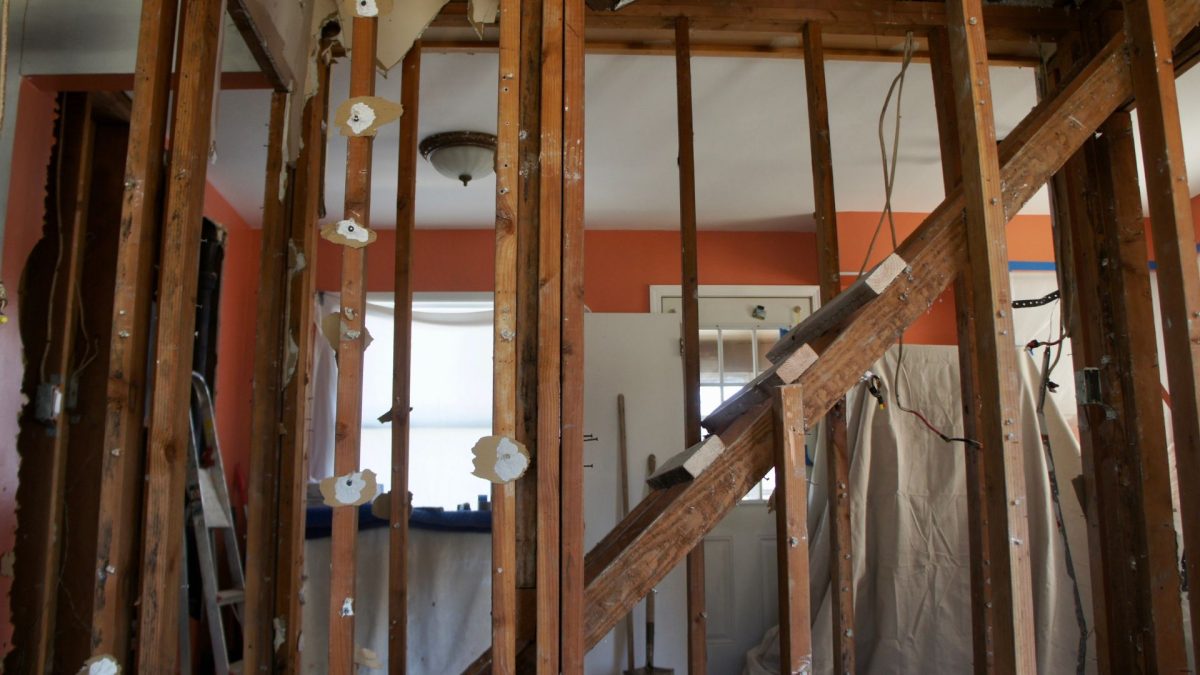
Safely Handling Electrical and Plumbing Systems
Behind every drywall sheet may lie electrical wires or plumbing lines waiting to surprise you. Before removal, shut off power to the area. Locate outlets, switches, and light fixtures, marking their positions with tape. This helps you avoid accidental cuts that could lead to dangerous shocks or costly repairs.
If plumbing runs behind the wall, inspect for any signs of leakage or corrosion before removing panels. Water damage might mean additional repairs are needed once the drywall is gone. When uncertain, bring in a licensed professional to assess wiring or pipes. Taking these steps ensures that your demolition doesn’t turn into a disaster. Caution is the most valuable tool you can use during drywall removal.
Choosing the Right Tools for the Job
Having the right tools can make drywall removal efficient and safe. A utility knife, pry bar, hammer, and screw gun are essentials. Use the utility knife to cut clean edges, minimizing damage to studs or insulation. Pry bars help detach large sections while maintaining control, reducing unnecessary breakage.
Power tools like a drill can speed up screw removal, while a drywall saw makes it easier to cut around fixtures or outlets. Don’t forget gloves and safety glasses—they’re as vital as any tool in your kit. Each instrument plays a unique role, contributing to a cleaner, more controlled process. Choosing quality over convenience saves time, limits waste, and ensures each piece comes down smoothly.
Dealing with Old or Damaged Drywall
Old drywall can crumble easily, releasing more dust than expected. If the wall shows signs of mold or water stains, wear protective gear to avoid exposure. These issues often indicate deeper problems like leaks or poor ventilation that should be fixed before reinstalling new panels.
In some cases, drywall might be attached with stubborn adhesive or rusted screws. Applying gentle pressure while using a pry bar prevents damage to the studs beneath. Removing damaged drywall takes patience; rushing through can result in costly mistakes. Once removed, inspect the underlying structure to ensure it’s free of pests, moisture, or structural weakness. Addressing these before replacing drywall keeps your renovation durable and healthy.
Efficient Waste Disposal and Recycling Options
After drywall removal, you’ll face piles of broken panels and fine dust. Disposing of these materials properly is crucial. Many municipalities prohibit drywall in regular trash due to gypsum’s environmental impact. Instead, check local recycling centers that accept construction waste. Some facilities can even repurpose gypsum into agricultural products or new building materials.
Separate metal screws, nails, and other hardware from the debris. Bag smaller pieces for easier transport, and sweep frequently to keep dust levels low. Responsible disposal prevents environmental harm and promotes sustainability. It also clears the way for your next renovation step without clutter. The less you send to the landfill, the better it is for both your project and the planet.
Timing Your Drywall Removal Project
Timing affects everything—from convenience to cost. Plan your removal during moderate weather to avoid humidity and discomfort. If you’re working indoors without air conditioning, early mornings or late afternoons can offer more comfortable conditions. Schedule enough time to handle cleanup properly; rushing increases the risk of mistakes.
If your renovation involves multiple phases, complete drywall removal before installing new flooring or cabinetry. This sequence keeps your surfaces clean and avoids potential damage. Proper timing also allows for inspections, ensuring no hidden problems linger behind your walls. When everything aligns, you’ll save effort, protect your home, and maintain your momentum toward transformation.
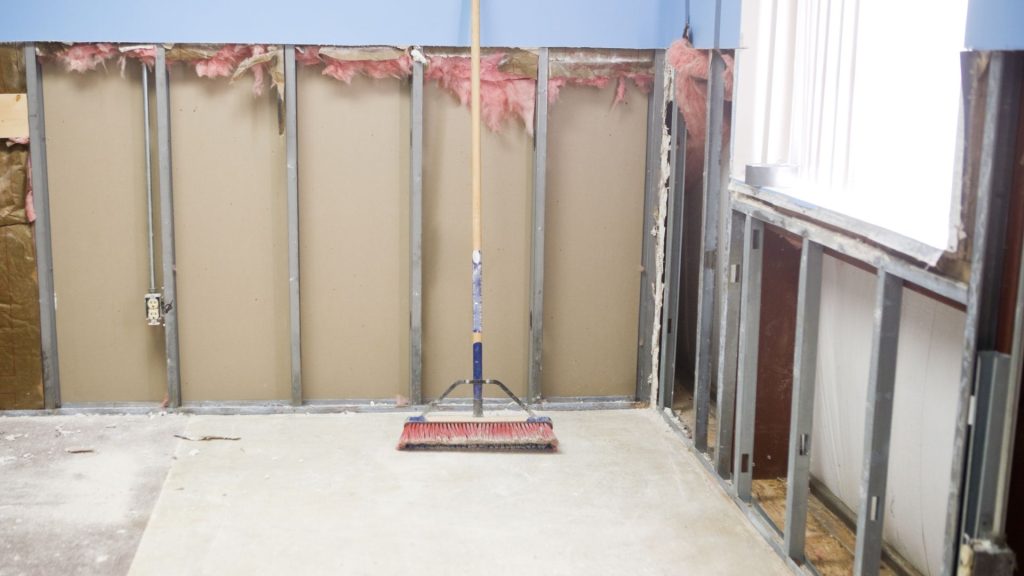
Post-Removal Inspection and Cleanup
Once the drywall is gone, the work isn’t quite finished. A careful inspection of the exposed framing, insulation, and wiring helps identify issues that may have been hidden. Look for mold, rot, or insect damage—early detection saves time and money later.
After inspection, a detailed cleanup ensures your space is ready for rebuilding. Vacuum walls, floors, and crevices with a HEPA-filter vacuum to remove fine dust. Wipe down all surfaces using damp cloths to capture residual particles. A clean foundation paves the way for a smoother installation process. When done right, the post-removal phase brings your project full circle, transforming a dusty demolition into a fresh start.
Conclusion
Preparing your home for drywall removal requires patience, precision, and a clear plan. Each step—from clearing the room to managing dust—creates the foundation for a safe, efficient project. Whether you’re refreshing a single room or tackling a full-scale renovation, organization and protection ensure long-term results.
If you’re ready to take the next step but prefer professional help, 24-7 Junk Removal in Palatine, IL can make the process effortless. Their experienced team handles Junk Removal and drywall debris cleanup quickly and responsibly, leaving your space spotless and ready for what comes next. For expert service and peace of mind, contact them at (773) 309-6966 or visit them at 611 W. Wise Schaumburg, IL 60193. You can also email support@24-7junk.com to schedule your service today.
