
Before jumping into any major demolition, it’s crucial to understand why the deck has to go. Maybe the wood has rotted over time, nails are popping out like reminders of old summers, or perhaps the space simply doesn’t fit your vision anymore. Whatever the reason, removing a deck isn’t just about taking it apart—it’s about preparing for what comes next. This mindset makes every decision intentional, from dismantling to cleanup.
Taking the time to assess the deck’s condition helps you spot safety hazards early. Loose boards, unstable railings, and hidden mold can make removal risky if not handled carefully. Knowing whether you plan to rebuild, repurpose, or clear the area entirely determines how the process unfolds. The more clarity you have at the start, the smoother and more efficient your project becomes.
Evaluating the Scope and Structure of Your Deck
Every deck has its own story and structure. Some are simple wooden platforms, while others feature multi-level designs with stairs, railings, and built-in seating. Evaluating these details helps you understand how complex the removal might be. A deck built with pressure-treated wood or concrete footings will require different tools and techniques than one made from composite boards. This is the stage where preparation meets practicality.
Inspection also helps you identify connections between the deck and the house. Some decks are freestanding, others are attached directly to the frame of your home. A poorly planned disconnection can cause costly damage. Take note of how each piece is fastened. Every bolt, beam, and joist contributes to the overall puzzle. A careful survey keeps surprises to a minimum and the work focused.
Preparing the Area for Safe and Efficient Work
Before any hammer hits wood, preparation must come first. Clear the deck of furniture, planters, and anything that could get in the way. Make sure power tools and extension cords are kept away from moisture and trip hazards. Safety gear—gloves, safety glasses, dust masks, and sturdy boots—should be part of your standard checklist. A little planning prevents a lot of frustration later.
You’ll also want to protect the surrounding area. Nearby windows, siding, and landscaping can easily get damaged by debris. Laying down tarps or plywood sheets can shield what’s around your work zone. It might feel like an extra step, but it pays off when you’re not picking splinters out of your grass for weeks afterward.
Disassembling Deck Railings and Stairs First
Every removal project benefits from a sequence, and starting from the top down is often best. Railings and stairs are usually the most accessible components, making them the logical starting point. Detaching these parts first allows you to create clear space for the heavier dismantling later. Use a pry bar or impact driver to carefully release fasteners without splintering too much of the wood.
Taking apart railings and stairs separately also helps maintain control of the workspace. When these sections come off cleanly, you can better manage debris and keep pathways open for hauling materials. The goal is not just destruction—it’s controlled deconstruction. Keeping this order of operations in mind sets a steady rhythm for the project and keeps your progress visible and manageable.
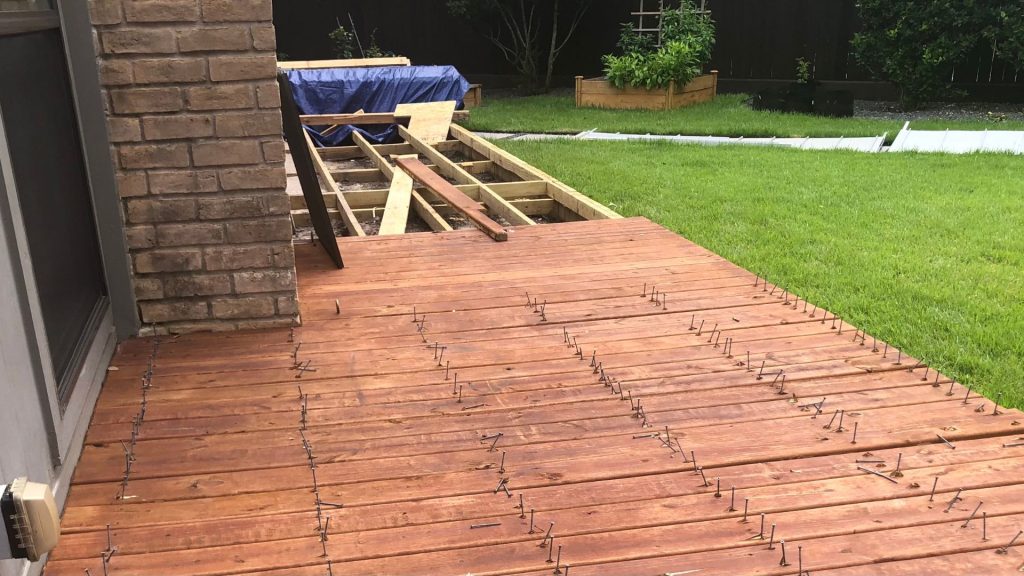
Removing Deck Boards Strategically
Deck boards form the visible heart of your structure. Once the rails and stairs are out of the way, removing these boards becomes much easier. Some boards may be warped or splintered, while others might still be solid. Start loosening them from one end and work across systematically. A crowbar or drill works well here, depending on how the boards are secured.
This part of the process can reveal what’s hidden underneath—nests, rust, or moisture damage that might have been overlooked. Handle each section with caution, especially if the boards are heavy or slippery. Stack the boards neatly to keep the workspace tidy. The sense of progress becomes more tangible with every board removed, and that momentum helps carry the project forward.
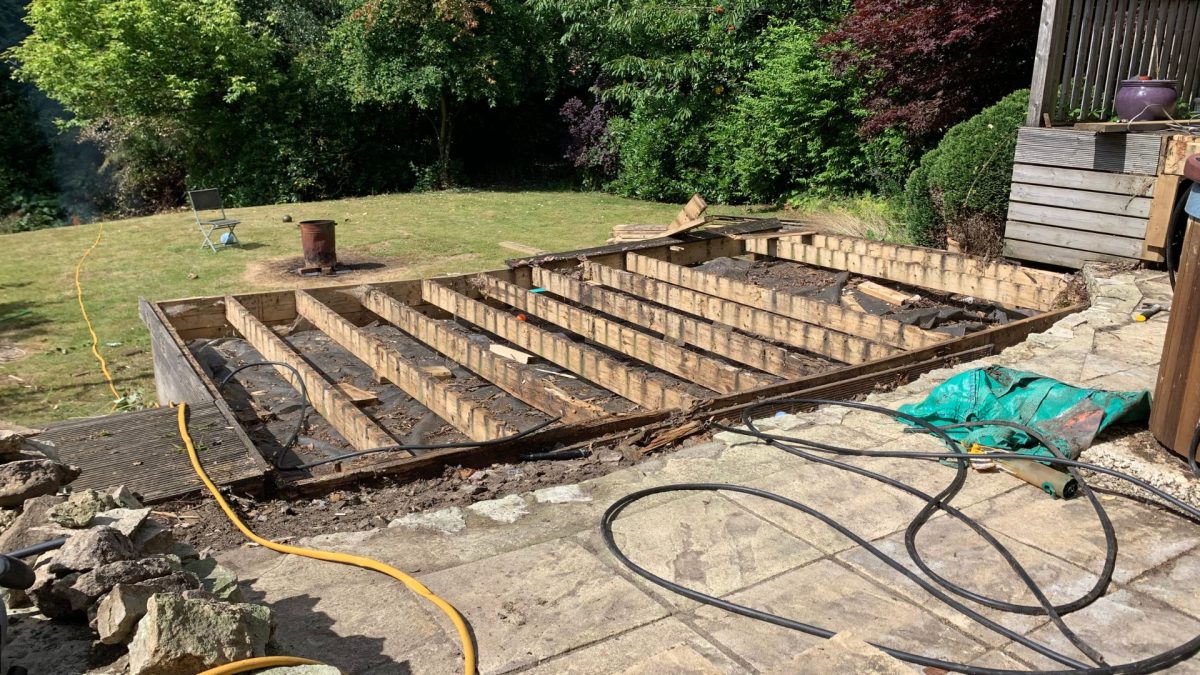
Handling Support Beams and Joists Safely
Once the surface boards are gone, the real structure comes into view. Beams and joists are the backbone of any deck, and they require patience to remove safely. Depending on how they were fastened, you might need wrenches, a reciprocating saw, or a sledgehammer. Always double-check that the area is stable before cutting through any major supports.
Support beams can be heavier than expected. Enlist help if needed, and avoid working underneath partially removed structures. When dismantling these pieces, look for signs of decay or damage that might affect how you dispose of the materials. By managing the process carefully, you reduce the risk of injury and maintain control as the deck gradually comes down.
Managing Debris and Material Disposal
Once the bulk of the removal is complete, the next challenge is managing what’s left behind. Old lumber, nails, screws, and concrete footings can add up quickly. Keeping materials organized during the process helps make cleanup faster. You can separate reusable wood from rotted or painted boards that need to be disposed of properly.
For homeowners who prefer efficiency, professional junk removal services can handle hauling and recycling in one trip. They have the equipment and trucks needed to remove large piles of debris safely. Proper disposal isn’t just about convenience—it’s also about environmental responsibility. Getting rid of materials the right way prevents clutter and makes space for the next phase of your home improvement plans.
Considering Utility Lines and Structural Attachments
Many decks are built close to electrical outlets, lighting systems, or irrigation lines. Before any removal begins, it’s essential to locate and secure these utilities. Damaging them can lead to costly repairs or safety hazards. If the deck connects directly to your home, pay attention to flashing or waterproofing around the house wall. Removing it carelessly can open gaps where water can seep in later.
Consulting a professional before tackling these sections can prevent unnecessary risks. They can identify hidden wiring or piping that might not be visible to the untrained eye. This part of planning often goes unnoticed, but it’s one of the most important steps to protect both your home and your budget.
Knowing When to Call in Professional Help
DIY deck removal sounds simple until the first beam resists every tool in your arsenal. Some decks are built with layers of materials or heavy framing that make solo removal impractical. When that happens, professional help becomes not just convenient but necessary. Professionals bring both experience and equipment to handle stubborn structures efficiently.
Working with experts also helps ensure compliance with local regulations, especially if your project involves concrete removal or hazardous materials like old paint. They can manage hauling, recycling, and disposal without the chaos that comes from doing it alone. Hiring help isn’t admitting defeat—it’s making a smart choice for safety and time management.
Planning What Comes After the Deck Removal
Removing the deck is only half the journey. Once the old structure is gone, you’re left with possibilities. Maybe you’ll replace it with a new deck made of modern materials, or perhaps you’re envisioning a stone patio or garden. Preparing the ground, checking for levelness, and addressing drainage issues ensures the next phase starts on solid footing.
You can also think creatively about repurposing salvaged materials. Some boards might be reusable for garden edging or DIY furniture projects. Whatever your plan, taking time to visualize the next step keeps momentum alive and prevents your backyard from turning into a forgotten patch of dirt. Planning for what comes after gives the entire removal process purpose and direction.
Maintaining Safety and Efficiency Throughout the Project
Deck removal demands more than strength—it requires attention and patience. Keep your tools sharp, your footing steady, and your focus clear. Working methodically ensures that each piece comes down without causing harm. Even if progress feels slow, steady removal minimizes risk and reduces cleanup later.
Efficiency doesn’t mean rushing. It’s about keeping materials organized, debris contained, and tools within reach. Taking short breaks to evaluate your progress helps you adjust methods if needed. The safest projects are those where planning and execution flow together naturally. A calm, focused approach turns even a labor-heavy task into a manageable process.
Conclusion
Planning a deck removal project effectively starts with a solid strategy and ends with a clean, safe space ready for transformation. Every phase—from inspection to debris disposal—benefits from patience, organization, and the right kind of help. Whether you’re preparing for a full backyard renovation or simply making room for something new, it’s the preparation that determines how smoothly the process unfolds.
For those in Palatine, IL, expert assistance is always within reach. 24-7 Junk Removal offers professional Junk Removal services designed to handle deck dismantling and cleanup with care and efficiency. You can reach them at (773) 309-6966 or visit their office at 611 W. Wise Schaumburg, IL 60193. For inquiries, email support@24-7junk.com. With their help, clearing out old decks becomes less of a chore and more of a step toward your next great outdoor upgrade.