
Removing old flooring is a task that extends far beyond simply lifting boards, tiles, or carpet. The process is about more than aesthetics—it involves carefully preparing the space to ensure the structural integrity of the subfloor remains uncompromised. Many homeowners and DIY enthusiasts underestimate the impact improper removal can have on their property. Prying up flooring without consideration can leave scratches, dents, or even holes in the subfloor, which may necessitate costly repairs or cause issues with the installation of new flooring. Proper planning ensures not only a cleaner result but also protects your investment in the new floor.
Assessing the type of flooring is crucial before beginning removal. Different materials—hardwood, laminate, vinyl, tile, and carpet—demand different techniques and tools. By understanding the nuances of each material, you reduce the risk of injury, material waste, or damage to the surrounding structure. Preparing for dust, debris, and potential hazards is part of a thorough removal process. Safety gear such as gloves, goggles, and knee pads is non-negotiable, while ensuring proper ventilation can reduce exposure to dust particles, mold, or chemical residues that sometimes exist under older floors. This preparatory phase lays the groundwork for a smoother, safer process and sets the tone for professional-quality results.
Tools and Equipment Needed for Safe Removal
Having the right tools is one of the most critical elements in effective flooring removal. Each type of flooring requires specialized equipment to prevent damage to the underlying subfloor while minimizing effort and physical strain. Hardwood or laminate floors often require pry bars, hammers, and sometimes circular saws for stubborn sections, whereas carpet removal demands sharp utility knives, pliers, and sometimes a knee kicker to loosen areas around walls. Tile removal may involve chisels, hammers, and mallets, while vinyl can require heat guns or scrapers to loosen adhesive. Being prepared with these tools saves time and prevents frustration that comes from improvising mid-task.
Beyond the essential removal tools, protective equipment cannot be overlooked. Safety goggles, dust masks, sturdy gloves, and knee pads are necessary to guard against flying debris, splinters, and dust inhalation. Drop cloths or tarps help contain the mess, keeping both the work area and surrounding home cleaner. Containing debris and preparing the workspace reduces the risk of slips, trips, and injuries, and streamlines the overall project. Thoughtful preparation ensures efficiency, protects your property, and guarantees the flooring removal is both effective and safe from start to finish.
Preparing the Space for Flooring Removal
Before tackling flooring, preparing the room properly is key to ensuring efficiency and safety. Remove all furniture, rugs, and any items that could obstruct movement or create tripping hazards. In some cases, doors or baseboards may need to be temporarily removed to allow full access to edges and corners. Creating a clear and open workspace facilitates smoother movements and allows workers to identify potential hazards, such as loose boards or nails, before they become accidents.
In addition, marking utilities and fragile areas like heating vents, electrical outlets, or plumbing lines prevents costly damage. Even subtle obstructions hidden under flooring can pose safety risks if overlooked. Establishing a debris removal path beforehand is also beneficial, making it easier to transport removed materials out of the space. When the environment is well-organized and prepped, the actual removal process is far less stressful and far more productive, minimizing downtime and reducing the chances of errors.
Techniques for Carpet Removal
Carpet removal may seem straightforward, but improper handling can cause unnecessary strain or damage to the subfloor. Begin by pulling up tack strips or staples holding the carpet in place. Cutting the carpet into manageable strips ensures easier handling and reduces the risk of muscle strain. Rolling and bundling sections immediately helps maintain a tidy workspace and prevents tripping hazards. Attention to detail during this phase guarantees a safer, more organized removal process.
Once the carpet is removed, inspect the padding underneath. Old padding often harbors allergens, mold, or odors and should be discarded to prevent problems with the new flooring. Cleaning the subfloor thoroughly, removing any remaining staples, nails, or adhesive residues, prepares it for installation of new flooring. By handling both the carpet and the underlying padding properly, the space becomes ready for a new layer of flooring that will lay flat, adhere properly, and last longer without issues.
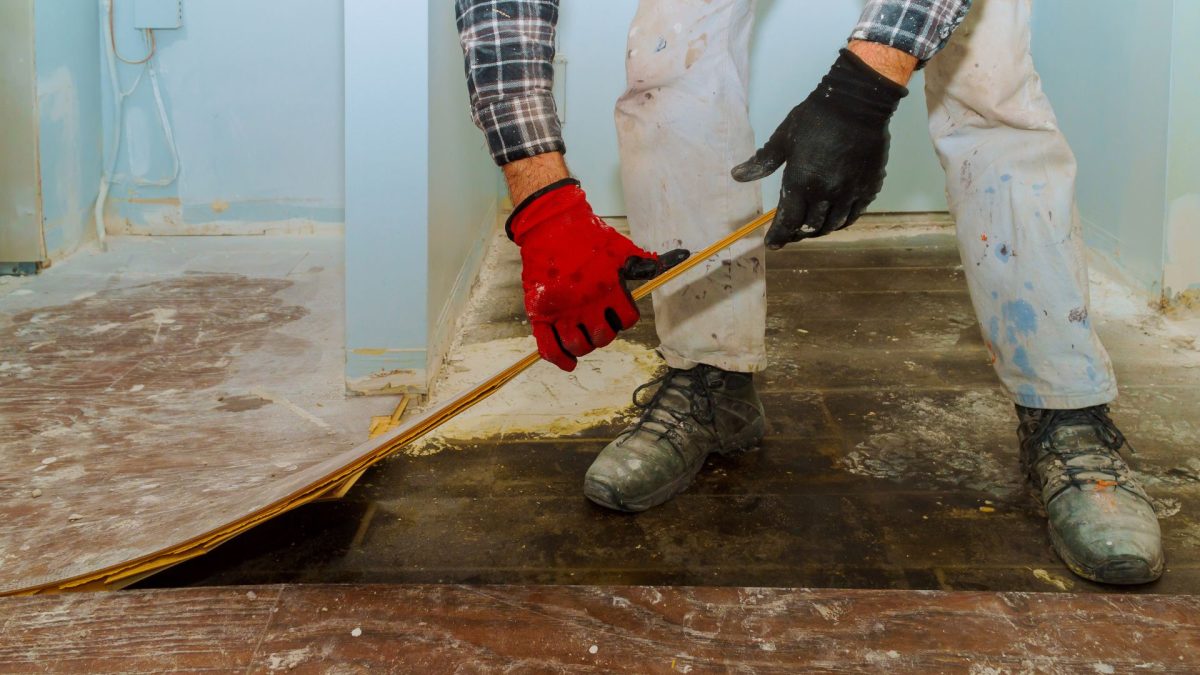
Removing Hardwood and Laminate Flooring
Hardwood and laminate floors require careful attention due to their rigidity and potential reuse value. Start by removing trim and molding to access edges safely, then work gradually from one side of the room to the other. Using pry bars and hammers cautiously helps avoid splintering or cracking boards. For floors that are nailed down, gently prying boards from underneath ensures minimal subfloor damage. A methodical pace is essential; rushing can result in broken boards, damaged underlayment, and more work in the long run.
For glued-down hardwood or laminate, using a heat gun or adhesive remover softens the glue, making removal easier without excessive force. After the boards are lifted, the subfloor should be inspected for uneven areas, protruding nails, or other damage that could interfere with new flooring installation. Proper attention at this stage saves future headaches and ensures the next flooring project starts on a solid, even foundation, whether you’re installing hardwood, laminate, or another material.
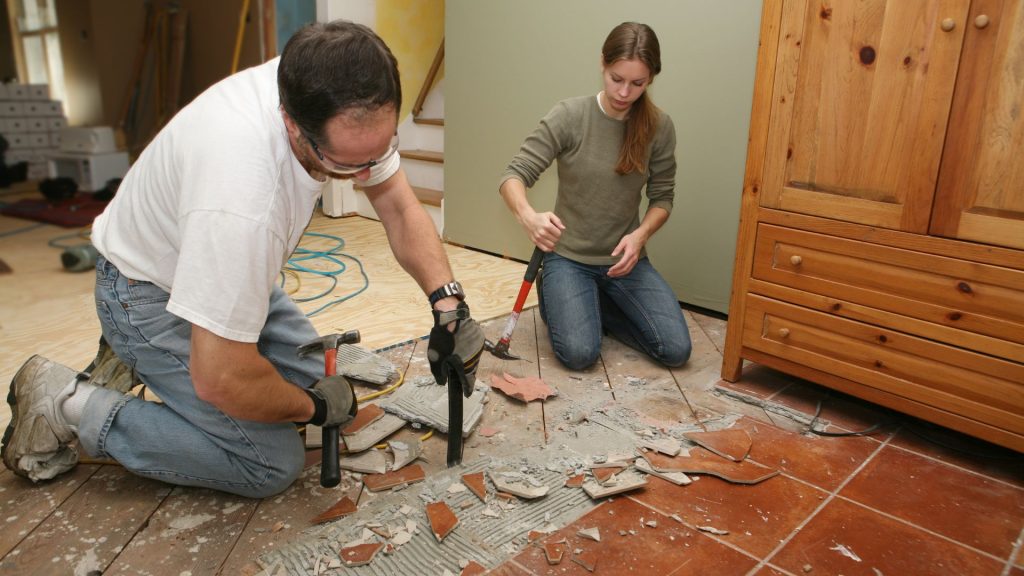
Strategies for Tile and Vinyl Removal
Tile removal is often labor-intensive and requires a patient, strategic approach. Begin by chipping away grout between tiles using a grout saw or chisel, then carefully lift individual tiles. Starting from a corner or previously damaged area often makes the process more manageable. Vinyl removal can be equally challenging, especially when adhesives have strongly bonded it to the subfloor. Scoring the vinyl and applying heat with a heat gun softens the adhesive, simplifying the scraping process.
Protective measures are crucial for these tasks. Gloves, safety goggles, and dust masks reduce risk from sharp debris and airborne particles. Tarps or plastic sheeting contain dust and broken tiles, preventing damage to surrounding areas. Adequate ventilation helps keep the workspace safe and comfortable. The key to tile and vinyl removal is patience; rushing the process may damage the subfloor, requiring repairs that can significantly increase project time and cost.
Handling Adhesives and Subfloor Preparation
Adhesives left behind from old flooring can compromise the installation of new materials. Scrapers, heat guns, and specialized adhesive removers help remove stubborn residues effectively. Incomplete adhesive removal can cause uneven surfaces, poor adhesion, or bubbles in new flooring, leading to a short lifespan or an unsightly finish. Spending extra time on this phase ensures the subfloor is ready for seamless installation.
After removing adhesives, inspect the subfloor carefully for damage. Sanding high spots, filling low areas, or patching cracks creates a flat, even surface. Proper subfloor preparation is essential for achieving a professional appearance and avoiding future issues such as squeaking, warping, or uneven flooring. Attention to detail during this stage saves time and money later, ensuring that your new flooring not only looks great but performs well over time.
Safety Measures During Flooring Removal
Safety should always be a top priority during flooring removal. Floors may conceal nails, staples, broken glass, or chemical residues that can pose risks. Wearing protective gear such as gloves, goggles, and dust masks is essential. Proper lifting techniques and assistance when handling heavy materials reduce strain and prevent injury, especially when dealing with hardwood planks or large tiles.
Dust control is another critical aspect of safety. Frequent sweeping, vacuuming, and maintaining proper ventilation reduces exposure to airborne particles that can irritate the lungs or cause allergic reactions. Awareness of surroundings, proper tool handling, and adherence to safety protocols ensure that flooring removal is not only efficient but also safe, protecting both workers and the home environment from accidents or damage.
Eco-Friendly Disposal of Flooring Materials
Responsible disposal of removed flooring helps minimize environmental impact. Separate materials that can be recycled, such as hardwood, metal trims, or tiles, from general waste. Donating salvageable items can also reduce landfill contributions. Many materials can be repurposed creatively in other projects, extending their lifecycle and promoting sustainability.
Planning ahead for disposal ensures the project remains organized and efficient. Partnering with recycling centers or facilities that accept building materials promotes eco-friendly practices and may reduce disposal costs. Thoughtful management of debris contributes to a cleaner, safer environment and supports responsible renovation practices. Eco-conscious handling reflects care not just for the home but also for the wider community.
Efficient Cleanup and Site Restoration
After flooring removal, proper cleanup is essential to restore the space. Sweeping, vacuuming, and wiping down surfaces removes dust and debris. Inspect the subfloor for any minor damage and perform repairs as needed. Reinstalling trim, baseboards, and other components helps the space feel complete and ready for new flooring.
Organizing leftover tools and materials contributes to both safety and efficiency for the next stage of renovation. Ensuring that the workspace is free of hazards prevents accidents and provides a professional, polished look. Thorough cleanup and restoration enhance the durability of the new flooring and reflect a commitment to careful, high-quality work.
Conclusion
Effective flooring removal is a blend of planning, preparation, proper tools, and adherence to safety protocols. Each type of flooring presents unique challenges, and addressing these carefully preserves the subfloor and ensures a smooth transition to new materials. Attention to detail, patience, and strategic preparation result in a cleaner, safer, and more professional renovation process.
For residents and businesses seeking expert assistance, 24-7 Junk Removal in Palatine, IL offers professional Junk Removal services. Their team handles flooring debris safely and efficiently, ensuring spaces are ready for renovation without added stress. Contact 24-7 Junk Removal at (773) 309-6966 or visit their office at 611 W. Wise Schaumburg, IL 60193. For questions or service inquiries, email support@24-7junk.com. Their expertise guarantees eco-conscious, reliable solutions that save time and maintain safety, leaving homes and businesses ready for their next project.