
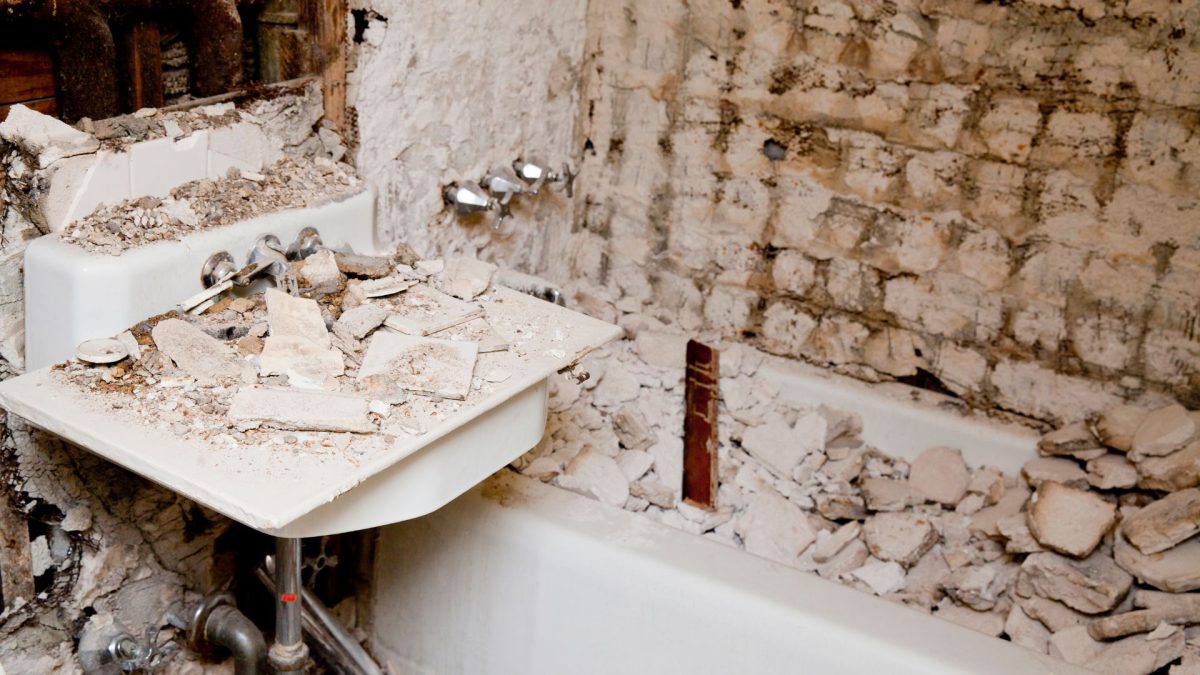
Bathroom demolition isn’t just about breaking tiles or tearing down walls—it’s about clearing the way for renewal. Every outdated fixture, every cracked surface, hides a story of use and time. When you decide to give your bathroom a fresh start, demolition becomes the crucial first act of transformation. It allows you to peel back the layers and understand what’s beneath the surface. Old plumbing, damaged subfloors, and hidden mold all come to light, giving you a clear picture of what needs attention before rebuilding begins.
This step creates the foundation for a lasting renovation. A proper demolition helps prevent future problems, saving time and expense later on. It also makes space for creative design possibilities. Once the debris is cleared, you’re free to imagine a new layout, new finishes, and a modern atmosphere. Demolition is, in essence, the reset button your home deserves—one that prepares the space for a future filled with comfort and style.
Planning the Demolition Process
Behind every successful bathroom transformation is a well-thought-out demolition plan. Before the first hammer swings, there’s a checklist to consider. Water lines must be shut off, electricity disconnected, and fragile elements protected. These steps ensure that the project moves forward without accidents or costly surprises. Knowing what materials you’ll encounter—whether ceramic, drywall, or concrete—helps determine the right tools and techniques for removal.
Good planning doesn’t just protect your home; it also keeps your project organized. Sorting out what can be recycled or repurposed minimizes waste, and creating a schedule prevents unnecessary delays. A clean, calculated start allows for a smoother renovation path. When everything is mapped out properly, you’ll see the space transition from cluttered to ready in no time, with less stress and more control over the outcome.
Tools and Equipment for Safe Demolition
Every efficient bathroom demolition begins with the right set of tools. Safety goggles, dust masks, gloves, and sturdy boots become your best friends during the process. Without them, even a minor accident could turn into a bigger setback. Power tools such as reciprocating saws, hammers, pry bars, and drills help make the job faster and more efficient. Having a shop vacuum or debris container nearby keeps dust and broken materials under control, which is crucial for maintaining a safe workspace.
But tools alone aren’t enough. Understanding how to use them properly ensures not only efficiency but also safety. Knowing where to cut or pry prevents damage to essential structural components. The goal isn’t chaos—it’s controlled dismantling. A well-equipped and informed homeowner can transform the demolition process from a messy task into a methodical art of removal that sets the tone for a flawless renovation ahead.
Managing Waste and Debris
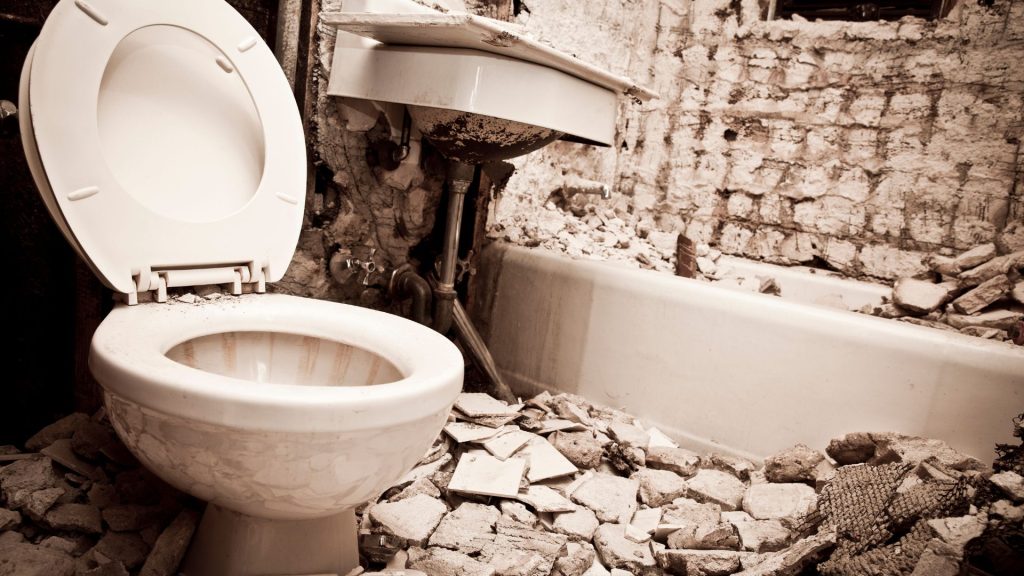
Bathroom demolition creates an incredible amount of debris—broken tiles, plaster dust, splintered wood, and outdated fixtures all pile up quickly. Managing this waste efficiently keeps the space safer and cleaner. Designate an area or container specifically for debris collection before you even begin. Segregating materials that can be recycled, like metal or ceramics, not only helps the environment but also keeps disposal costs down.
Hiring a professional debris removal service ensures everything is handled responsibly. They can remove large quantities swiftly and dispose of hazardous materials according to safety regulations. Keeping your site organized prevents clutter that could lead to accidents or delays. Once everything unwanted is out of the way, you’re left with a blank canvas ready for the new design to unfold. Cleanliness during demolition sets the tone for the renovation’s success.
Protecting Your Home During Demolition
When demolishing a bathroom, the rest of your home still needs protection. Dust travels farther than expected, seeping into vents, hallways, and other rooms. Sealing doorways and covering floors with protective sheets minimizes cleanup afterward. Turning off air systems temporarily prevents dust from spreading through ducts, keeping your indoor air quality intact.
Even vibrations from removing tile or walls can affect nearby surfaces. Monitoring for cracks or loosening fixtures ensures no unintended damage occurs elsewhere. It’s a detail many overlook until it’s too late. Taking a proactive approach—covering furniture, sealing off work zones, and double-checking insulation—keeps the chaos contained. When your demolition area is well-protected, the rest of your home remains peaceful and unaffected by the mess of progress.
Handling Plumbing and Electrical Components
Bathrooms are packed with pipes and wiring hidden behind walls and under floors. Before demolition starts, identifying where these lines run is vital. Shutting off water valves and disconnecting electrical circuits helps avoid leaks, sparks, or worse. Removing old fixtures like sinks, bathtubs, and lighting should be done carefully, ensuring no damage to plumbing systems that will be reused.
It’s often wise to consult or hire a professional plumber or electrician for this part of the project. They can safely disconnect utilities and ensure your space is secure before demolition proceeds. Proper handling of these components also prevents contamination or flooding. Once everything is disconnected and capped off, you can focus on the physical removal work with confidence, knowing the space is safe to transform without any hidden dangers lurking behind the walls.
Preparing for Structural Changes
When planning a bathroom redesign, sometimes the demolition extends beyond removing tiles or fixtures. Walls might need to come down, floors replaced, or new windows added for light and ventilation. Preparing for these structural changes means understanding the layout of your home—what’s load-bearing, what’s cosmetic, and what can safely be altered.
Professional inspection helps determine what changes are feasible without compromising stability. Reinforcing beams or re-framing walls might be necessary to accommodate a new bathtub or walk-in shower. Taking these precautions before renovation begins saves headaches later. The goal is to remove with purpose, not recklessness. Structural preparation bridges the gap between demolition and design, ensuring that the new elements you envision will stand strong for years to come.
Safety Tips During Bathroom Demolition
Safety isn’t optional—it’s the backbone of any successful demolition. Protective gear should always be worn from the start to the end of the project. Sharp edges, falling debris, and exposed nails can cause serious injuries if not handled carefully. Keeping a first-aid kit on site and ensuring everyone involved knows basic safety procedures provides peace of mind throughout the process.
In addition, ventilation plays a huge role. Bathrooms often contain mold, asbestos, or chemical residues from older materials. Keeping windows open or using fans helps reduce exposure. Working slowly and methodically is also safer than rushing to tear everything out at once. Taking breaks and staying aware of your surroundings allows the demolition to stay controlled, ensuring both safety and efficiency every step of the way.
The Importance of Proper Cleanup After Demolition
Once the demolition dust settles, cleanup becomes the unsung hero of the process. It’s not just about making the area look tidy—it’s about preparing it for construction. Leftover debris can hide cracks, damage, or uneven surfaces that need fixing before rebuilding begins. Sweeping, vacuuming, and wiping down surfaces clears the space and exposes any issues that need attention.
Proper cleanup also prevents delays in the renovation timeline. Dust particles can interfere with paint, adhesives, and sealants used later. Disposing of waste correctly ensures the area is safe for contractors to begin installation without obstacles. When the last bit of rubble is gone, what remains is potential—a space cleared and ready to embrace its next design chapter, free of clutter and complications.
How Demolition Sets the Stage for Design
Every renovation starts with imagination, but demolition gives that imagination room to breathe. Removing old elements lets you see the space in its rawest form, offering clarity and inspiration for what comes next. Walls stripped bare reveal new layout possibilities; an empty floor shows how light falls differently.
This stage is where creativity meets practicality. You can visualize new storage solutions, improved lighting, and better flow once the clutter of the old is gone. It’s not destruction—it’s discovery. Every piece removed brings you closer to the vision of your dream bathroom. Once demolition is complete, you’re standing at the threshold of renewal, with endless possibilities waiting to be built upon that clean foundation.
Conclusion
Bathroom demolition is the bold first step toward creating a space that truly feels refreshed. It’s a process that demands preparation, patience, and precision, but the results are worth every effort. A well-executed demolition clears away years of wear and sets the foundation for a modern, functional, and beautiful bathroom. Whether it’s updating fixtures or completely reimagining the layout, starting with a clean slate ensures your new space will stand strong and stylish for years.
For dependable assistance with debris removal and site cleanup, reach out to 24-7 Junk Removal in Palatine, IL. Their team ensures your demolition waste is handled safely and efficiently, leaving your home spotless and ready for the next phase of renovation. For inquiries or to schedule a Junk Removal service, call (773) 309-6966, visit them at 611 W. Wise Schaumburg, IL 60193, or email support@24-7junk.com to get started on transforming your home with ease and professionalism.
