
Every bathroom demolition begins with one essential question—how deep are you willing to go? Some homeowners envision a simple fixture swap, while others aim for a complete tear-down that exposes the bones of the room. The key is clarity. Knowing whether you’re replacing tile, removing drywall, or redoing plumbing affects every stage of planning. Even the smallest decision, like keeping an existing vanity, can change the cost and timeline dramatically. Without a clear sense of scope, what seems like a quick weekend project can snowball into weeks of debris, dust, and unexpected repairs hiding beneath the surface.
Before swinging a hammer, assess what materials and structures make up your bathroom. Older homes may have layers of outdated tile, plaster walls, or even asbestos-containing materials that require professional handling. Evaluating the full picture not only shapes your approach but ensures safety and compliance with local codes. A well-defined plan protects you from costly surprises once demolition begins.
Preparing the Space for Demolition
A successful bathroom demolition doesn’t start with tools—it starts with preparation. The more you organize before dismantling, the smoother things run. Begin by clearing out everything not bolted down. Towels, toiletries, shelves, and mirrors should all find temporary homes elsewhere. Demolition gets messy fast, and anything left behind risks damage or contamination from dust. It’s also worth sealing vents and doorways with plastic sheeting to prevent debris from drifting into other rooms.
Shut off utilities before you even think about demolition. Water lines, electricity, and sometimes even gas must be cut off to avoid dangerous mishaps. Once utilities are off, drain all fixtures to reduce leaks. Some people overlook small details—like removing the toilet wax ring or disconnecting vanity plumbing—which can lead to unwanted flooding. Proper preparation makes the work safer, faster, and less stressful, setting the stage for efficient cleanup later.
Essential Tools for Bathroom Demolition
When it comes to demolition, having the right tools can turn chaos into control. A sturdy sledgehammer might look like the star of the show, but finesse often wins out over brute force. Crowbars, utility knives, and reciprocating saws are indispensable for breaking down fixtures cleanly. Protective gear—gloves, goggles, and masks—are not accessories; they’re essentials. The amount of dust and sharp debris a demolition creates can turn hazardous in seconds without them.
For plumbing and electrical disconnections, wrenches and voltage testers should be close at hand. Buckets, trash bags, and shop vacs keep the mess manageable as you go. Investing in a few high-quality tools may feel unnecessary, but it pays off in efficiency and reduced frustration. It’s not about smashing walls—it’s about removing each layer with purpose and safety in mind. Having every tool ready before starting prevents costly interruptions halfway through.
Handling Plumbing and Electrical Components Safely
Few parts of bathroom demolition demand as much caution as plumbing and electrical systems. These two hidden elements can cause major trouble if mishandled. Before removing any fixture, confirm that both the water supply and electricity are completely shut off. Then, trace every visible pipe and wire. What looks like an unused line might still carry current or water pressure. Taking time to understand your layout minimizes risk and damage.
For plumbing, use caps to seal exposed lines once fixtures are removed. This prevents leaks while you continue working. Electrical outlets and light fixtures should be detached carefully, with wires safely capped or disconnected. If you encounter confusion—or wiring that looks old or tampered with—pause and call a professional. Accidents happen most often when people assume something is “probably fine.” Treat every hidden pipe and wire as active until proven otherwise. Safety should always outweigh speed.
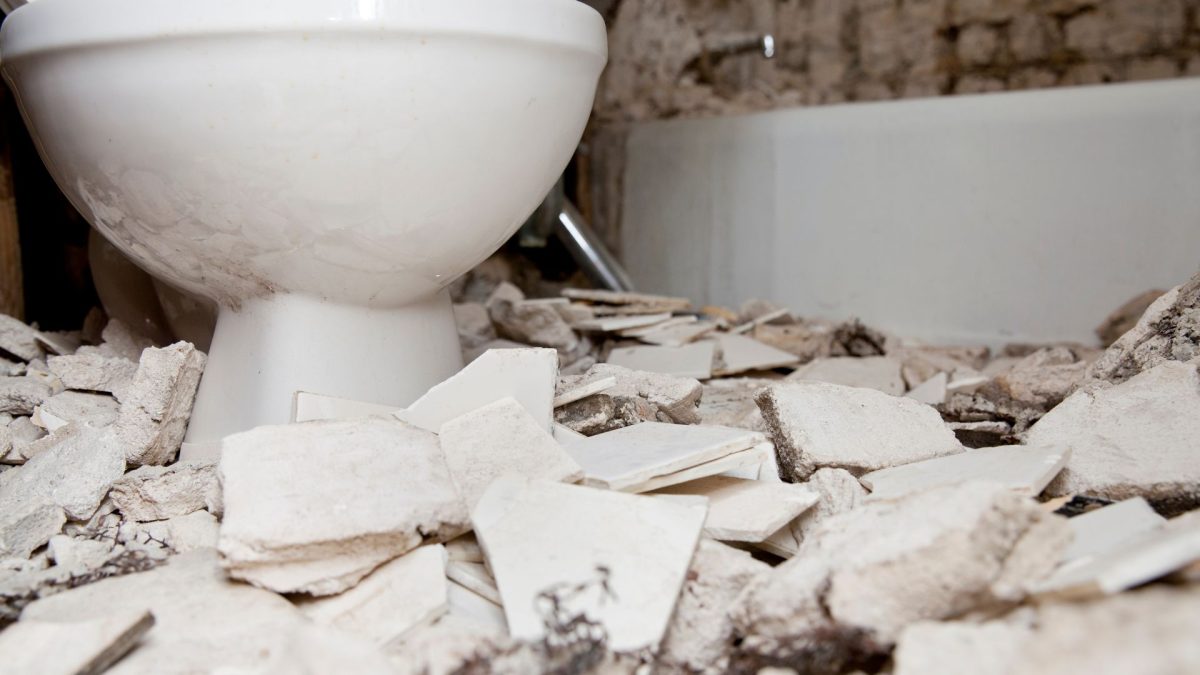
Managing Dust, Debris, and Waste During Demolition
One of the least glamorous but most crucial parts of demolition is debris management. Bathrooms produce a surprising volume of waste—broken tiles, drywall chunks, shattered glass, and plumbing fixtures all pile up fast. Without a plan for removal, it quickly becomes overwhelming. Using heavy-duty trash bags and keeping a designated disposal area nearby prevents clutter from taking over the workspace. Regularly clearing debris also makes movement safer and more efficient.
Dust is an invisible enemy during bathroom demolition. Tiny particles can infiltrate HVAC systems and spread throughout the house. Use plastic sheeting, painter’s tape, and temporary barriers to contain dust inside the work zone. A shop vacuum with a HEPA filter helps keep surfaces clear. When possible, open windows for ventilation, but keep airflow directed away from clean areas. Managing debris effectively is what separates a well-organized project from one that spirals into chaos.
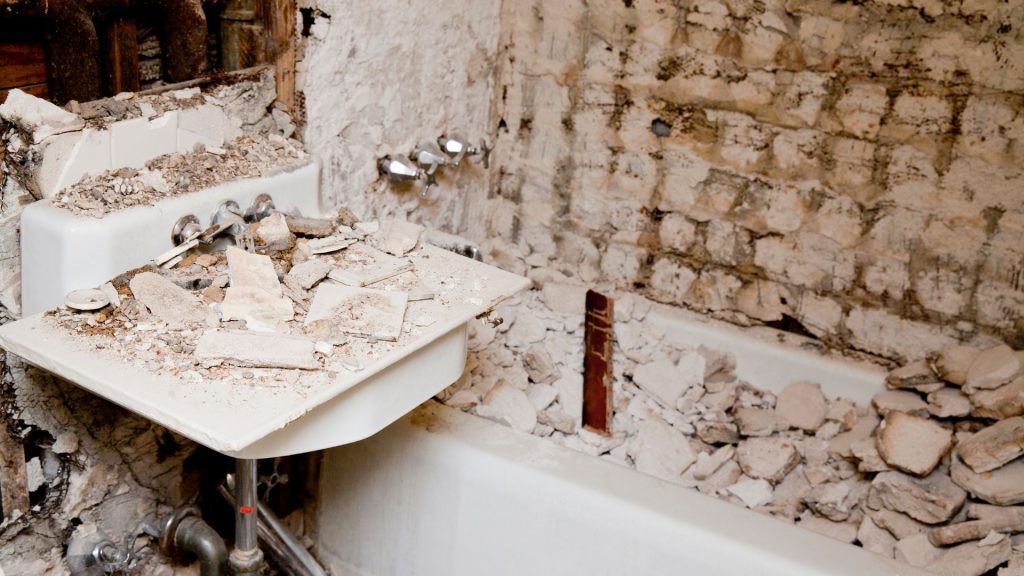
Recognizing Hidden Problems Behind Walls and Floors
Demolition often uncovers what homeowners least expect. Behind that old tile might be rotted subflooring or mold thriving in damp insulation. These discoveries are frustrating but valuable. Identifying structural or moisture issues early prevents them from undermining your future remodel. It’s far better to find damaged plumbing or sagging joists during demolition than after the new materials go up.
Once walls and floors are open, inspect for discoloration, soft spots, or a musty smell—all red flags for water damage. If you see mold, avoid disturbing it until you know how to handle remediation safely. Some issues require professionals to test and treat contamination. Use demolition as an opportunity for inspection, not just destruction. By addressing hidden problems now, your renovation stands on a solid and healthy foundation.
Estimating Time and Costs for Bathroom Demolition
It’s easy to underestimate the time and cost of bathroom demolition. At first glance, removing old fixtures seems simple—but each step reveals new layers of work. Labor, disposal fees, tool rentals, and possible repairs can add up quickly. Creating a budget that includes both expected and “just-in-case” expenses keeps surprises manageable. It’s better to overestimate and finish under budget than the reverse.
Time management is equally vital. Depending on the bathroom’s size and complexity, demolition could take a few days or more than a week. Hidden plumbing issues or hard-to-remove tile often slow progress. Having a flexible timeline allows for these interruptions without derailing your entire renovation. Careful estimation ensures you’re not stuck halfway through the project with rising costs and mounting frustration.
Understanding Permits and Local Regulations
Bathroom demolition might feel like a personal project, but it still falls under local building rules. Some municipalities require permits for removing walls, altering plumbing, or disturbing asbestos-containing materials. Ignoring permit requirements can lead to fines or delays when it’s time to rebuild. Before starting, check your local codes to understand what documentation you need. A few calls to your town’s building department can save major headaches later.
Compliance isn’t just bureaucracy—it’s protection. Permits ensure your project meets safety standards, preventing electrical or plumbing errors that could endanger your home. Regulations also dictate how debris, especially hazardous materials, should be handled. Proper disposal keeps your renovation environmentally responsible. Understanding your legal obligations gives you peace of mind and allows you to focus on the creative side of remodeling without worry.
Timing Demolition with Your Overall Renovation Schedule
Demolition is the spark that ignites a renovation, but timing is everything. Starting too early means living with a gutted bathroom longer than necessary. Starting too late risks delaying contractors or inspections. Ideally, demolition aligns perfectly with your remodeling schedule so there’s a smooth transition from teardown to rebuilding. Coordination between trades—plumbers, electricians, and installers—keeps the process flowing.
Create a timeline that factors in demolition cleanup and potential repairs discovered during teardown. If mold or water damage emerges, those fixes need time before reconstruction begins. Staggering tasks thoughtfully helps prevent downtime and frustration. Timing also affects disposal scheduling; having debris removed promptly clears space for the next phase. Strategic timing transforms demolition from chaos into the foundation of an efficient remodel.
Choosing Between DIY and Professional Demolition
There’s a certain satisfaction in handling your own demolition. It feels empowering, budget-friendly, and a little thrilling. But it’s not for everyone. DIY demolition works best for smaller bathrooms or surface-level tear-outs. Once you start dealing with complex plumbing, wiring, or potential structural changes, the risks increase. Professionals bring expertise, safety equipment, and efficient cleanup that can justify the cost.
Before deciding, assess your comfort level with physical labor and unexpected complications. Even with tutorials and planning, things rarely go exactly as imagined. Professionals not only handle demolition but also manage disposal, permits, and hazardous materials. If you value speed, safety, and a clean workspace, hiring help often outweighs the savings of doing it solo. The right choice depends on your project’s scale and your willingness to get your hands dirty.
Planning for Post-Demolition Cleanup
Once the last tile falls and the debris clears, cleanup begins—a stage often underestimated. Leftover dust, fine debris, and broken fragments can linger long after demolition. Thorough cleaning ensures your renovation starts fresh and free from residue that might affect new installations. Sweeping and vacuuming repeatedly helps remove fine particles that cling to surfaces.
Don’t overlook disposal logistics. Arrange for debris pickup or transport before demolition begins to avoid piles of waste sitting around. Some materials may require special disposal, particularly if they contain adhesives or older finishes. Post-demolition cleanup isn’t glamorous, but it brings closure to the messy part of the process. Once everything’s spotless, the real transformation can begin.
Conclusion
Starting a bathroom demolition is more than just tearing things down—it’s about creating space for something new. From preparation and tool selection to safety and timing, every decision shapes the success of your renovation. When the dust settles, having professionals who understand efficient Junk Removal and cleanup can make the entire experience smoother and faster.
If you’re planning your next demolition or cleanup project, reach out to 24-7 Junk Removal based in Palatine, IL. Their team handles debris responsibly, ensuring your site stays clean and ready for renovation. For dependable service, contact them at (773) 309-6966, or visit them at 611 W. Wise Schaumburg, IL 60193. You can also email support@24-7junk.com for assistance. With the right help, your bathroom demolition becomes less about mess—and more about transformation.